


This unit provides students with the opportunity to expand their patterning skill level, using the alphabet as a basis for their designs. Students should be able to design their own letter based on a font, and incorporate design or other imagery to create an illuminated letter inspired by medieval text.
Relationship to Life
Students in the Second Grade will be learning about different cultures in their social studies lessons. An important part of European art and culture was the emergence of illuminated texts such as the Book of Kells and the Book of Durrow, in which religious texts were scribed using ornate detail, precious materials, and bound in gold and gems. This lesson will support their education in social studies, and will also introduce students to pattern-making with Zentangles. Students should be able to understand pattern, unity, emphasis, balance and contrast, composition and be able to render one letter in a font of their choice.
Problem/Activity Statement
Students are presented with the challenge of designing one letter using line and patterns to make an illuminated letter. Students choose the first letter of their name, or another letter that might be important to them. Using knowledge that they obtain during the preliminary Zentangle lesson, students will create their own embellished calligraphy. Students will first sketch out their ideas on paper, and then transfer their letters onto metal sheets. Finally, the metal will be worked in order to flatten out the background and emphasize parts of their design. Students will learn the importance of preparatory work and planning, as well as the need to make decisions and be willing to accept changes made to their work.
Goals
Students should:
Understand: The meanings of artistic works by explaining how the subject matter and/or form reflect the events, ideas, religions, and customs of people living at a particular time in history
(MCAF Standard 6)
The art making processes necessary to design and create their object.
(MCAF Standard: 4)
Ways a final product relates to a variety of time images and objects produced in other historical periods.
(MCAF Standards: 5 and 8)
Know: The art making processes necessary to design and create their object.
(MCAF Standard: 4)
Be Able to: apply knowledge of other disciplines in learning in and about the arts
(MCAF Standard 10)
Produce/construct an object that enables personal voices.
(MCAF Standard: 1)
Objectives
Identify and use ideas of one’s self to communicate through art making.
Use a variety of tools and techniques to apply the formal qualities of art.
Analyze and apply thematic compositional approaches used in illuminated texts from the medieval era.
Demonstrate an understanding of ways artists planned and designed illuminated texts.
Instructional Concepts
“The embellishment or ornamentation was not meant to be just surface decoration. The Scandinavians believed that the fabulous animal and bird forms lent their spirits to the objects on which their images rested.”
“For us the alphabet is usually a means of communication, but in the Middle Ages it was one of the great vehicles for amusement and instruction, as well as beauty. Fanciful devices, symbolic elements, floral beauty, narrative cartoons and a world of other embellishments worked into initial letters both delighted and improved the medieval monk.”
“Look at them superficially with the ordinary glance, and you would think it is an erasure, and not tracery. Fine craftsmanship is all about you, but you might not notice it. Look more keenly at it and you will penetrate to the very shrine of art. You will make out intricacies, so delicate and so subtle, so full of knots and links, with colours so fresh and vivid, that you might say that all this were the work of an angel, and not of a man.”
Line can be thick, thin or curved.
Line can be used to invent forms.
Color can be used for emphasis in a composition.
Texture can be used to create surface variety.
Forms can be identified by the use of surrounding objects in the environment.
Forms can be described in relation to parts of a while.
Balance can be achieved through the arrangement of line, shape, color, texture, space, or form within a composition.
Emphasis can be achieved through outlining.
Unity can be achieved through repetition of line, shape, color, texture, space, or form in a composition.
Rhythm can be achieved by varying the size of line, color, texture, shape and form.
Variety can be achieved through a change in tone or value.
Introducing children to art develops their visual awareness and provides a springboard for personal image making.
Narrative strategies help student artists develop their visual awareness and provide a springboard for personal image making.
Brainstorming helps students work through problems and eliminate challenges before working on their final projects.
Resources and Materials
Materials:
Newsprint
Graph paper
Thin sheet metal, gold, silver, bronze, etc.
Dulled pencils
Popsicle sticks
Black acrylic paint
Steel wool
Exemplars:
Books of Kells, Chi-Ro-Theta
“T”, Bible of Santa Maria de Ripoll, Spain (Bible of Farfa), Vatican Library, Rome, f. 138. 11th century.
“G”, from the Letters of St. Jerome, from the Abbey of Citeaux; Dijon, Bibliotheque Municipale MS. 135, f. 182; 12th century.
Zentangle 1-4, 2010 Design Originals. An Imprint of Fox Chapel Publishing. 1970 Broad Street, East Petersburg, PA.
Teacher exemplars
Motivation
The teacher will have prepared at least one example of their own work to show the class, including a preliminary sketch, a finished Illuminated Letter and an in-process project. The teacher will first demonstrate how to use the Zentangle book to compose a picture using several Zentangle patterns. The teacher will then show students how to draw a block letter on graph paper. The teacher will explain the next step in constructing their letters, including instruction on how to trace the letters, flatten the background, make shapes pop out or indent, and how to antique their letters.
The teacher will have prepared a folder for each table comprised of different fonts for the students to look at. The teacher will have also included pictures of medieval illuminated texts to show students what their project was inspired by. The class as a whole will brainstorm ideas for embellishments, including patterns, pictures, fonts, and technique.
The teacher will engage the students in a game to try to identify what letter is shown to them using medieval exemplars. Students will then discuss what they think was successful and unsuccessful in the exemplars and use these points as a basis for designing their own letters.
Questions
Topic Questions:
Why do you think artists went through so much trouble to make their books so beautiful?
What kinds of books were “illuminated”?
Could “illumination” pertain to more than one thing in reference to these texts?
Association Questions:
Have you ever seen a really fancy book?
Why might people want beautiful books now?
Have you ever drawn your name in a fancy way? How does it make you feel to see your name drawn with such care in detail?
Visualization Questions:
How might the skills from the Zentangles lesson be incorporated into your new designs?
What animals, shapes, or designs could be used in designing your letter to describe your personality?
Transition questions:
What Elements and Principles of Design are most important to remember when drawing embellished letters?
Procedures
Demonstration
The teacher will first show students the finished teacher exemplar. The teacher will then demonstrate how to create patterns using the Zentangle book. The teacher will continue the next lesson by showing them how to draw a letter step-by-step, showing how to first use basic shapes and then how to mold curves and serifs. The teacher will then discuss requirements for the assignment- serif fonts, at least one zentangle included, and outside embellishments around the letter-and go over new vocabulary. The teacher will allow students to draw their letters first before instructing them to move on to transfer their letters to metal. The teacher will repeatedly demonstrate technique of how to flatten or pop out different surfaces. When students’ drawings have been approved they will be allowed to transfer their drawings to metal. Finally, the teacher will demonstrate how to antique their letters using either black acrylic paint or steel wool.
Vocabulary:
Illuminated- To supply or brighten with light; to decorate; to enlighten as with knowledge.
Repousse- A metalworking technique in which a malleable metal is ornamented or shaped by hammering from the reverse side to create a design in low relief.
Serif- A small finishing stroke drawn diagonally or horizontally across the arm, stem and tail of letterforms.
Sans-serif- From the Latin, meaning “without serifs.”
Font- An alphabet and its companion characters in a given size, based on common design, typically consisting of letters and numbers, punctuation and actions and symbols.
Distribution
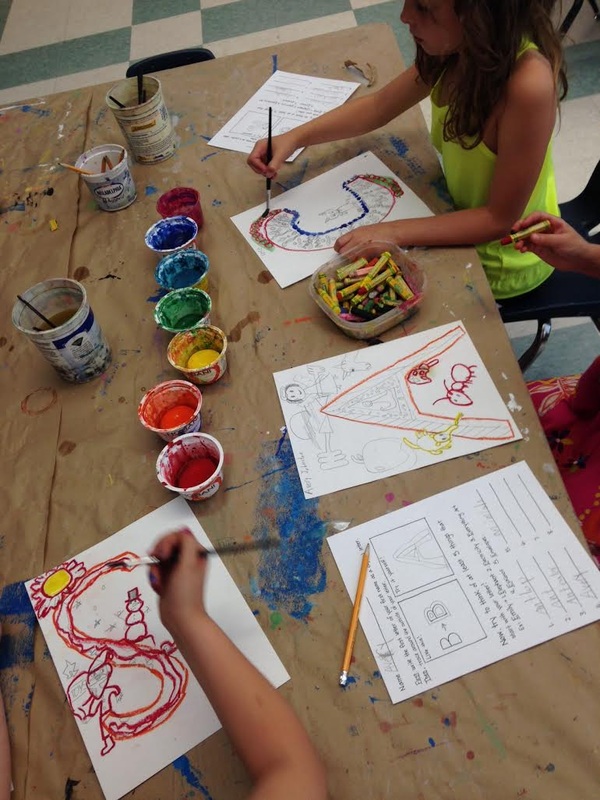
Students will first be given half-sheets of graph paper. They will be instructed to look at packets handed out to each table, which includes medieval exemplars and the alphabet in different serif fonts. When they move on to work on metal, students will have the option of working on different colors. They may choose their color, and will be given a popsicle stick and a wooden stylus. Steel wool will be available to be taken back to the tables, and a station with black acrylic paint will be set up for students.
Work period:
Lesson 1
The teacher will introduce the unit as a whole, and then show students examples of Zentangle compositions. The teacher will demonstrate how to draw Zentagle patterns, and students will be instructed to create their own small image, drawing inspiration from the Zentangle book.
Lesson 2
The teacher will demonstrate how to draw a block letter with serifs using graph paper and a ruler. Students will be given graph paper to begin building their letters. Students will be provided access to font books and books about illuminated manuscripts to give them ideas. Students will be asked to choose a letter that has meaning, and will be instructed to create a serif letter that incorporates a Zentangle design and embellishment around that letter.
Lesson 3
Students will finish their preliminary sketches, and re-draw their letters on the final graph paper. Students are encouraged to review the requirements of the project, in order to ensure that their letter has serifs, at least one Zentangle design, and embellishment on the outside of the letter.
Lesson 4
Before moving on to the final piece of foil, students will have one class to experiment and practice working the metal foil to achieve desired effects. Students may use their sketches to practice specific areas of their letter, or create an image independent of this project.
Lesson 5
Once students have completed their final drawings and practiced on the foil, students will be instructed to trace their letter on top of a sheet of foil in the color of their choice. Students must then flatten the background of their image, and make decisions concerning what they would like to pop up or indent in their design.
Lesson 6-7
The teacher will demonstrate how to add a finish to their letters, either using steel wool or paint to age the foil. Once their letter has been fully developed, and the metal worked to its full potential, students will be instructed to choose the finish they would like to apply to their letter, and will proceed to either apply steel wool to the letter’s surface or paint acrylic paint over the metal to antique their project.
Clean-up
At the end of each class, students must make sure their names are on their projects. If the student has moved on to working on the metal, they must secure their letter to the surface of the metal with tape to prevent the drawing from shifting. Materials will be returned to their proper place, and all drawings and foil letters will be handed in to the class folder at the end of each class, unless otherwise instructed to take the letter home for homework.
Closure
The teacher will go over what should have been accomplished by the end of the class, and what will be expected of each student during their next meeting. The teacher will review where materials and projects should be put away, and the class will be dismissed.
Evaluation
Students will be evaluated based on their understanding of procedure. Students are expected to complete a preliminary drawing before moving on to their final foil project. The preliminary drawings should demonstrate ability in creating a serif font of appropriate the width, which incorporates their knowledge of Zentangle patterns. Their drawings should also include decoration outside of the letter. Final foil letters will be evaluated based on the students ability to transfer their letter, and their ability to work the metal to enhance their design. Neatness, creativity and composition are important components of this assignment.
Did the students…
Create a serif letter, using the graph paper to help them create their design?
Did the students make their letter thick enough to incorporate at least one Zentangle design?
Did the students incorporate at least one Zentangle pattern in their design?
Did the students embellish their composition with pictures outside of the letter?
Did the students successfully transfer their drawings to the metal foil?
Did the students successfully work the metal to enhance their design?
